
You can allow new members to select a category as well other listing information for their online directory listing after joining. This option also lets you control the number of categories new members can select, and charge for additional listings if desired.
To add the Listing element to your form:
- In the form, in the location you want to add the Listing option, click New Form Element.
- Choose Add a Field, then choose Listing Information as the Field Type.
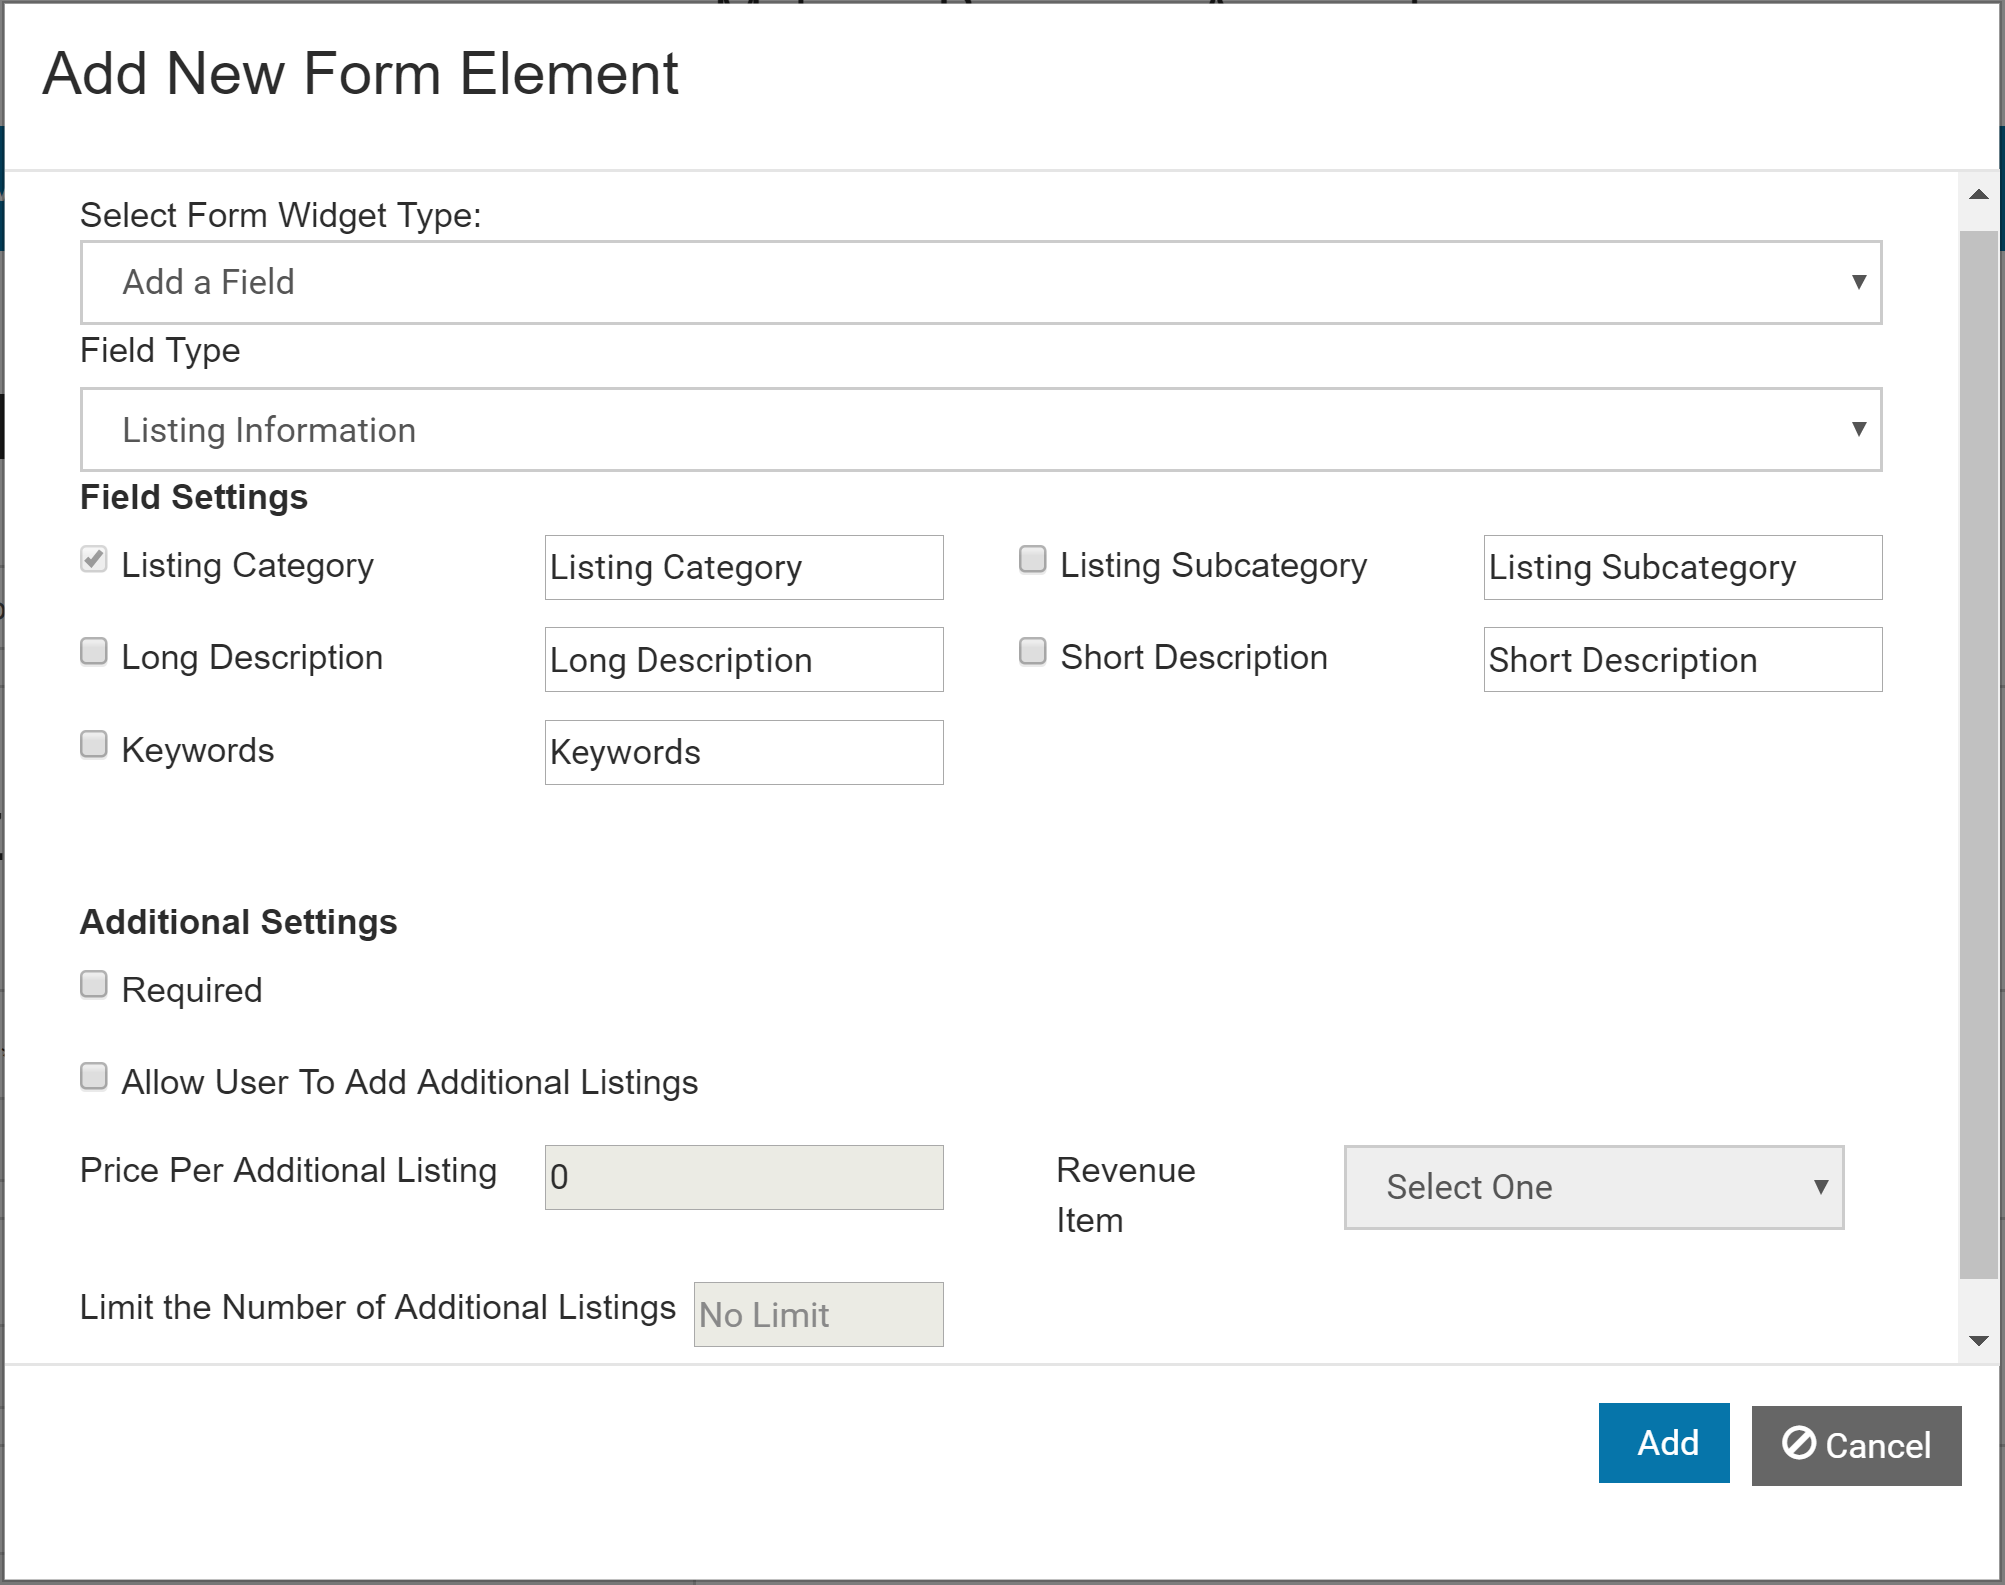
- Check the boxes next to each listing field you would like to collect (category is required). The new member will be able to enter values for each item selected, for each listing they add. If you want to change the label for any of the fields, type in what you want to be displayed next to each field in the form.
- If the primary category/listing fields is required in the form, check the Required checkbox.
- If you want the new member to be able to add more than one listing, check "Allow User to add Additional Listings." To limit the number of listings they can add, enter the total number of additional listings the member can add.
- To charge for the additional listings, enter a price in the Price Per Additional Listing field greater than 0. This amount will be added for each additional category the member chooses, it will not charge for the initial/primary category. Select the Revenue Item to use for the line items on the new member invoice for these additional listings.
- Click Add.
All of the primary listing fields you selected will be displayed on the public form, with a button that says "Add Additional Listing" if you've configured the form to allow more than one. The user will be able to click that button to add as many listings as you've allowed on the form, and these will create separate listings for each category chosen in the new member's profile.